Sunday, February 26, 2012

My patients


The flu arrived at our household on Thursday afternoon. We currently have two down with it. Praying that B and I stay healthy enough to take care of these little cuties.

There is so much illness going around our neighborhood right now, we knew something was coming. At least noone is throwing up (knock on wood, cross your fingers, say a prayer).

Take care and stay healthy, everyone.

Thursday, February 23, 2012

Mommy and N

N's first "non scribble scrabble" drawing. It's me and N. I love it. Had to share!

Wednesday, February 22, 2012

A New Goal

I just watched this snippet from the Ellen show. It shows an interview with actress Amanda Seyfried. She talks about how she knits while she's on the elliptical. I've always thought I'd work out much more if I could knit and workout at the same time. I've tried knitting and doing Wii Fit and quickly injured myself. (Stupid idea I know.) I've tried knitting while on the treadmill and had to go too slow to really feel good about it. Apparently, what I need is an elliptical. Then I can knit and workout to my heart's content.

New Goal for 2012: Find a cheap elliptical machine :).

Tuesday, February 14, 2012

Monday, February 13, 2012

Homemade Valentines

The boys and I made some homemade Valentines this afternoon.


Can you tell which one I made?

Tooth Fairy Envelope Tutorial

Earlier this month, J lost his first tooth. I knew it had been loose for about a week and I kept meaning to do something to prep for our first visit from the tooth fairy. But I never did. One night as I was reading him his bedtime stories, he just pulled it out. He was SO excited! He rushed downstairs to show B and immediately asked if he could keep it. So we scrounged around for something to put the tooth in (B found a plastic memory card case) and wrote a note to the tooth fairy asking if J could keep his tooth. The next morning J woke up to find a dollar squished into the case with his tooth. After he got over his disappointment over the fact the tooth fairy did not bring him a Lego set (I think he thought the tooth fairy was more like a female Santa Claus), he was excited.

Can you see the gap? It's down on the bottom and the new tooth is already poking up to fill it in.

Despite the fact that J was perfectly happy with his memory card case, I was not. So I bought some felt and went to work. I decided I wanted to make a tooth fairy envelope for J and my sister's two children. I wanted something that didn't take up too much room and something that wasn't too babyish since I know they will keep losing teeth until they are at least 10 or so.

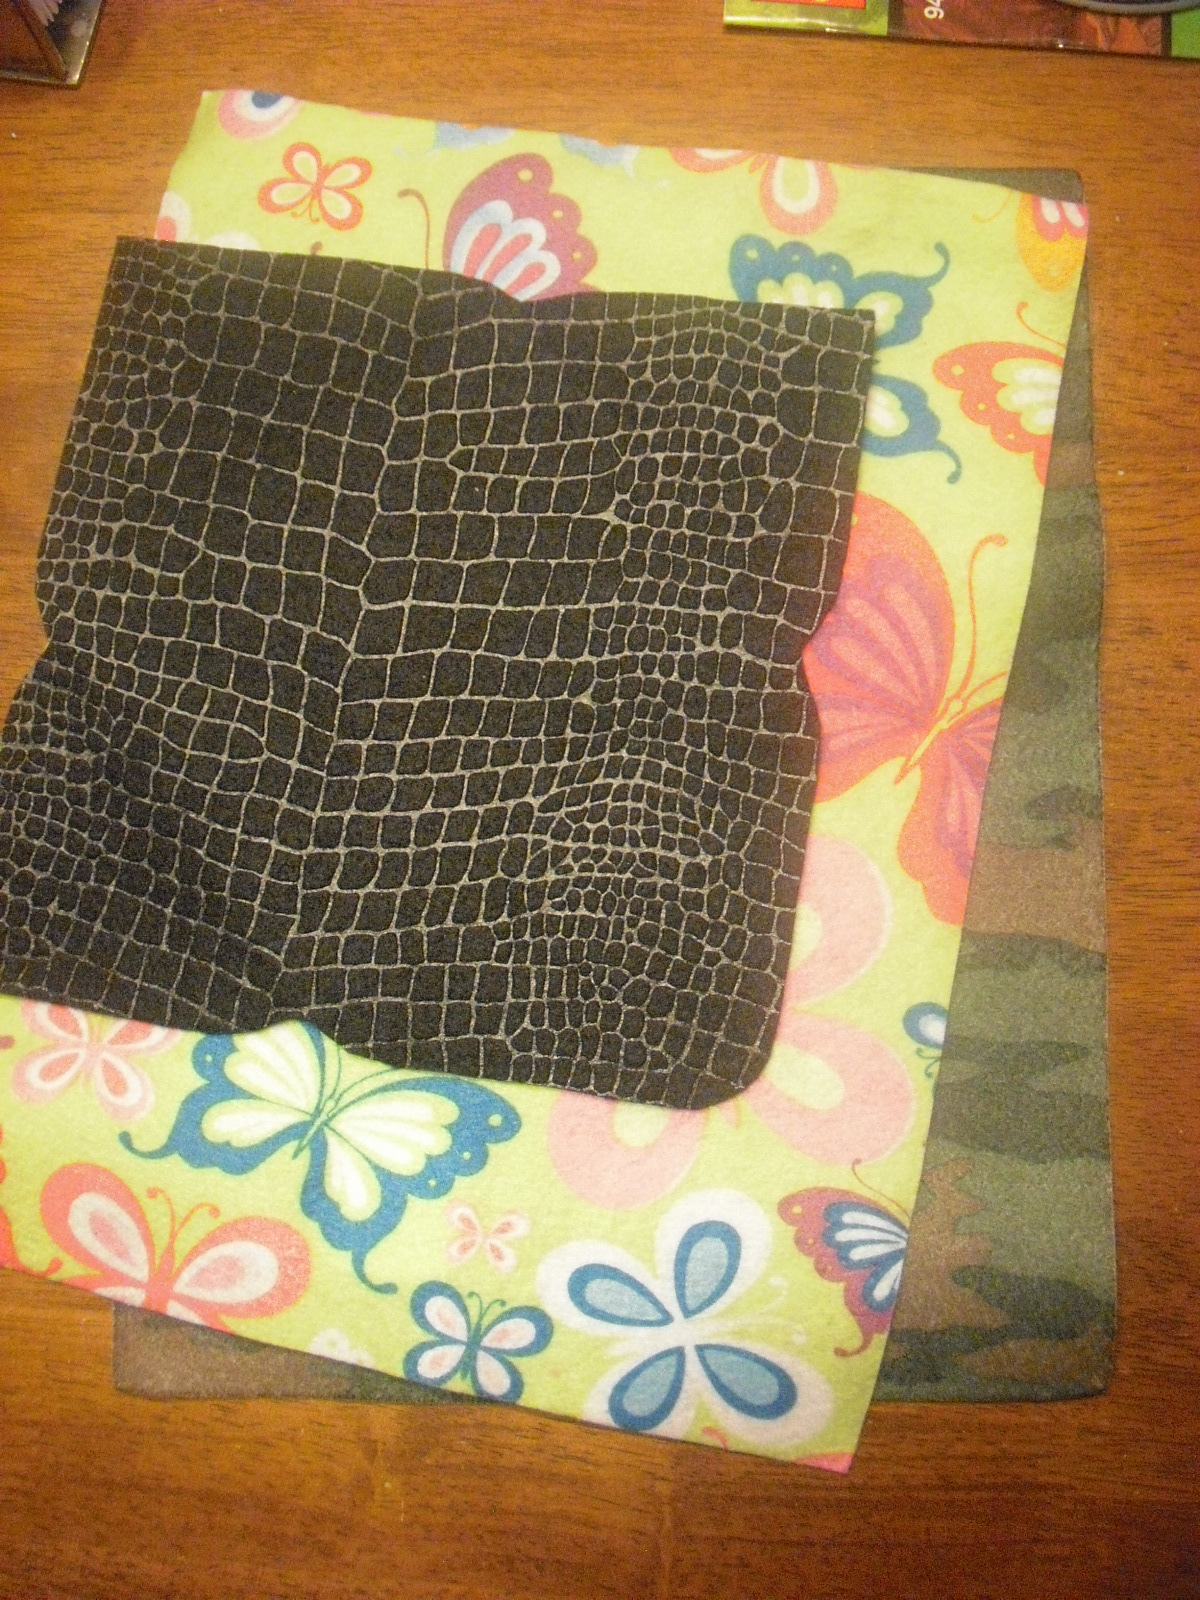
First I enlarged a mini-envelope template and cut it out of paper. I traced it onto my three pieces of felt. For this black "snakeskin" felt I used for J's, a white crayon worked great.


Here is J's piece cut out along with the felt for my 6 year-old niece and 8 year-old nephew.

Next I drew a large tooth on a piece of paper, cut it out to make a template, and cut out three white felt teeth (one for each of the envelopes).

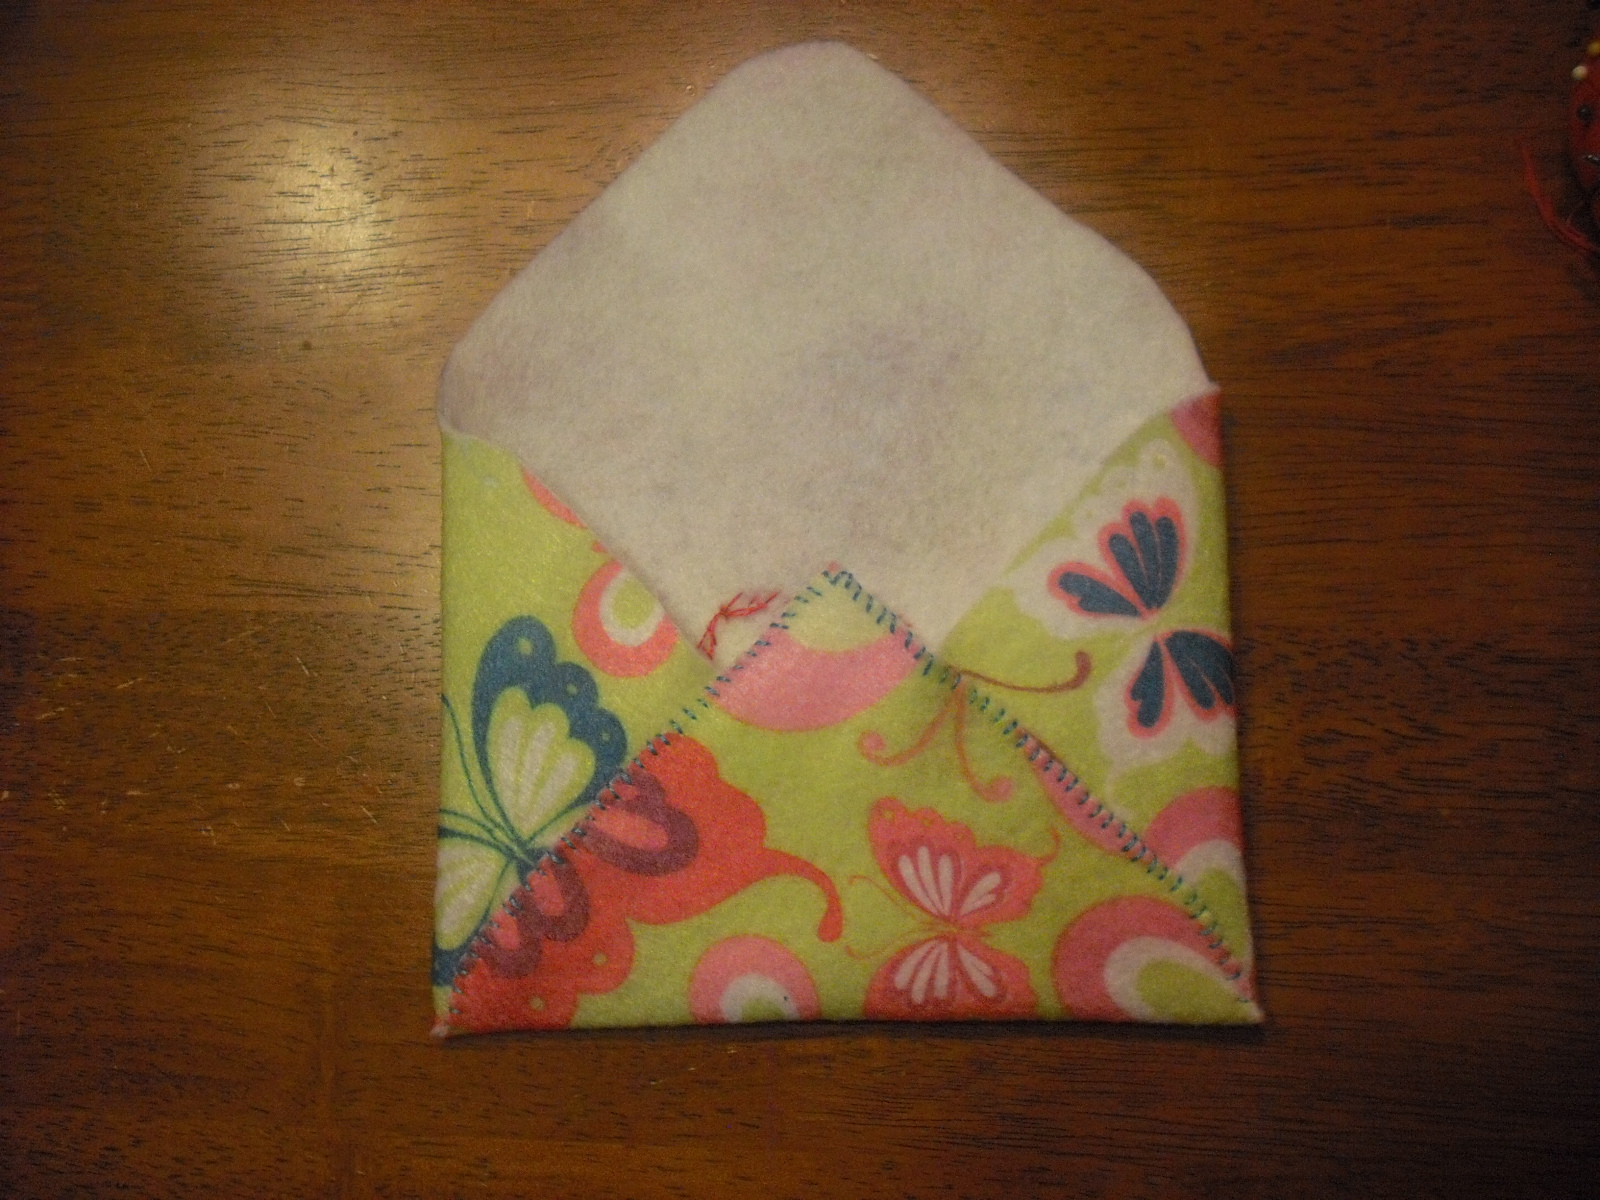
Next I pinned the tooth onto the middle of the front of the envelope. I found it easiest to fold the envelope up before pinning the tooth to better picture where it would go. The two smaller triangles are the side flaps, the large pointy corner is the bottom flap and the rounded corner is the top flap.


Next, I whip-stitched the tooth onto the envelope. I used bright contrasting colors for fun.

My nephew's envelope with his tooth all stitched on!

Next, I carefully folded down and pinned the side flaps.

And then carefully folded and pinned the bottom flap.

Then I whip-stitched the bottom flap onto the two sides. I started in the bottom right corner and worked my way around. I did decorative whip-stitch around the top corner of the flap because I thought it looked nicer than just carrying the thread across before heading down the other side. You could also, cut and tie the thread at the top of the right side and start a fresh thread on the left side if you don't want to do this.

Next I added the snaps. I did the top part of the snap first and then folded and pushed it down so it left an indentation where the bottom part of the snap needed to be attached.

The backs of the three envelopes.

The fronts of the three envelopes.

I really wanted to make something that would be convenient to use and, as I mentioned, not too babyish. I think these fit the bill. These envelopes are flat (so easy to put under pillows), but big enough (approximately 4" x 5.5") that they can hold notes, money, teeth and not get lost.

Here's a template I made if you want to use it. Just print it as a full page photo. Make sure your program doesn't try to fit it to the page and crop off the edges.

That's my little bit of craftiness to share. Sorry for the poor quality photographs. Happy Monday, everyone!

Tip  Junkie handmade projects

Wednesday, February 1, 2012

Finished: Rippled Cardigan for Cat

I finished knitting, blocking and seaming my sister's Ripple Cardigan. I made myself this cardigan in orange a while ago and wear it often. It's great over simple dresses, tanks, t-shirts and even long sleeved-shirts. A few months ago my sister requested one in cream and here it is:

When I knit my Rippled Cardigan I had a lot of trouble with dropped stitches. Since that time I have knit with this type of yarn (laceweight Mohair blend) a lot and thus had very few dropped stitches this time around. This sweater knit up very quickly. The seaming seemed to take almost as long as the knitting, but was enjoyable in its own way.

One trick I used for seaming, was holding the sweater pieces together with carefully placed bits of yarn. I lined up two end points (for example, the top and bottom of a seam) and tied them together. Then I folded each piece in half and marked the center points and tied them together. Then I kept halving the distance between two tied together points until the ties were only around 2 inches apart.


My other tip for this sweater is to make sure you bind off VERY loosely--especially on the fronts. They are knit side to side and the back is knit top to bottom. Thus if you bind off the fronts too tightly, it will make the side seams bunch when you sew the fronts to the back.

This detail on the back of the neck is one of my favorite parts of the sweater:

Pattern: Ripple Cardigan by Coralie Meslin
Size: Smallest
Yarn: 4 skeins of Debbie Bliss (76% Super Kid Mohair/ 24% Silk/ 200m/ 25g/ laceweight)
Color: Cream (15006)
Mods: I changed the sleeves to elbow length bell shape sleeves. See my Ravelry page for more details.

100th Day!

Today is J's 100th Day of Kindergarten. A very exciting milestone indeed.

He's been VERY excited about the 100th Day and all the fun events planned for it.

As part of the festivities, we were encouraged to create a 100th day shirt.

J and I decided to make a 100th Day tie dye.

It was really simple to make. We followed the directions that came with the tie dye kit. The only thing special we did was use exactly 100 rubber bands. J enjoyed counting them out in groups of 10.

Anyway, I thought it was pretty clever and turned out great--so I thought I'd share.

Happy 100th day, everyone!