
A few months ago I saw a hat (Courtyard) on Ravelry that I just fell in love with. Well, not the hat exactly, but the stitch pattern. I loved the cool hourglass-shaped twisted stitch pattern. So I bought the pattern, knit the hat and decided that I needed to knit a sweater in this stitch pattern.

Knitwear design Workshop by Shirley Paden
Custom Knits by Wendy Bernard
Knitting from the Top by Barbara G. Walker
I love knitting in the round and top-down which is what both Wendy and Barbara teach. Shirley's designs all focus on knitting in pieces and usually bottom-up, but her attention to detail and using math really helped me a lot.
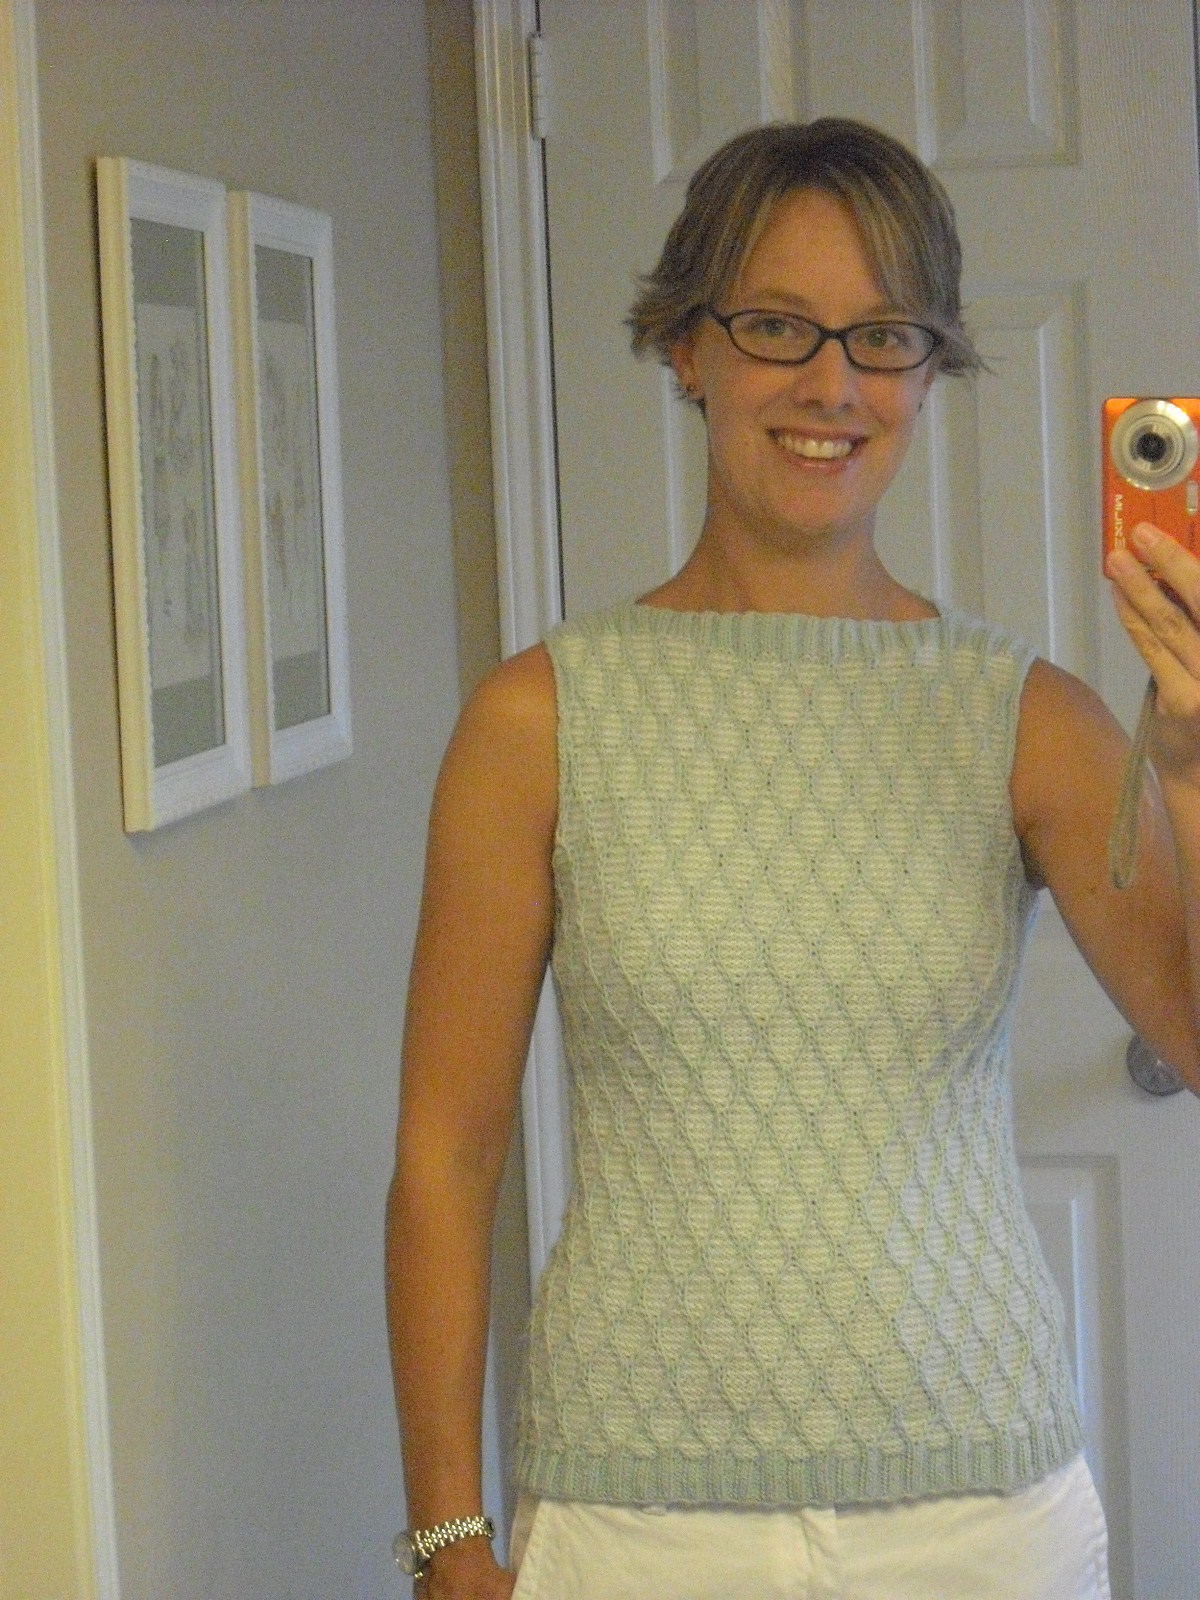
Anyway, I originally pictured a long-sleeve sweater in the same color scheme as my hat (golden yellow and white). However, I just couldn't figure out how to make this stitch pattern cooperate for a raglan and I just didn't feel like messing with set-in sleeves--so I decided to knit a boatneck tank. I also decided to knit in the round and from the bottom up. Although I often prefer top-down, bottom-up seemed to make more sense with this stitch pattern and style.
Next came the search for yarn. I just couldn't find yarn that I loved in the golden yellow and white (and suitable for a boatneck tank). Finally, as I perused my local yarn shop for the umpteenth time, I found the yarn: Sublime baby cashmere merino silk 4 ply. It is so soft (perfect for wearing next to bare skin) and lightweight (perfect for a summer tank). This was a step outside my comfort zone as I don't usually knit with anything quite this nice, but it worked out beautifully. I chose a white and a very pale greenish blue.
My next step was making a huge swatch (7 inches by 15 inches) knit in the round like my sweater.

Next, I looked through my shirts to find one with a fit I loved and that would work well for a model for my tank. I have a boatneck 3/4 sleeve shirt from Gap that I love and I decided to use it for measurements. I measured the shirt's width at the bottom hem and then continued measuring the width at one inch intervals until I reached the top of the shirt. I made note of armhole location as well. I kept these measurements with me throughout the process and they served as a sort of schematic for me.
Next, I did lots of math. I had already found my gauge from my giant swatch (8 st per inch and 10 rows per inch). I figured out how many stitches I needed to cast on (for the ribbing). I had decided to do a K2, P3 ribbing (instead of my original K2, P2 ribbing on my swatch) so that the bottom did not pull in. I figured out that I could simply decrease on the first row after ribbing to get everything to line up nicely from the ribbing to the twisted stitch pattern. After I figured out my cast on number and how to transition from the ribbing to the stitch pattern, I started working out where and how my decreases and increases would work. I even charted out the pattern to see how the decreases/increases would affect the flow of that part of the stitch pattern. I was lucky in that my stitch gauge was 8 stitches. Thus I had to decrease 4 stitches to decrease 1/2 inch or just 2 stitches to decrease 1/4 inch. My row gauge worked out to 10 rows per inch which was perfect as the stitch pattern was split into two 10 row repeats.
At this point, I just had to cast on and start knitting. So I knitted up to the armholes and then stopped to figure out the math for the armholes. I used Shirley Paden's Knitwear Design Workshop to help me. I was really nervous about it, but finally just did it and it worked out great. At this point, I had to switch to knitting back and forth. I thought this was going to make me end up with lots of ends to weave in because the pattern alternates between using the blue yarn one row and then the white the next and then the blue again, etc. This is no biggie when working in the round, you just leave the yarn and then carry it up after the next row. But when knitting flat, suddenly the yarn is at the wrong end of the row when you need it. After cutting ends for a few rows, I suddenly realized that I could just knit back when the yarn was on the wrong end. So I would do two rows right to left and then two rows left to right and then repeat. Very exciting to not have all those ends to weave in!
Finally, I approached the finish line--the top neck! I knew that I wanted a little bit of shaping, but not too much. I decided to do short rows on the outside edges of the front to give a slight dip without changing the pattern too much. I made sure that I got to a point in the stitch pattern where things were worked even so I didn't have to work twisted stitches in my short rows. I did about one inch ribbing on the top to match the ribbing on the bottom. I increased before the ribbing to do K2, P3 again. Ribbing was done on a smaller needle as well. For the back, I knit as the front except that I knit 10 more rows in pattern and no short rows. This raised the back neck up enough that the front wasn't too high. If I knit this again, I might do 2-4 less rows in the back. I think it might be a tad high. Finally I did a three needle bind off to join the top at the shoulders and a regular bind off across the front and back necks.

Now I had unfinished armholes to deal with. The fabric was too flimsy (because of slipped stitches right at the very edge of the armhole) to pick up stitches evenly. I was at a lost at first because I had originally planned a row or two of ribbing or a single crochet stitch edging. But both looked too messy with the loose slipped stitch fabric. What I ended up doing was knitting a crochet chain directly onto the front surface of the armhole. I used the blue yarn doubled and a medium sized crochet hook. I put the crochet hook directly through the fabric at the edge of the armhole, picked up a loop of yarn and pulled it through. I did this all around the armhole and am happy with the results.

Pattern: My own!
Stitch pattern from: Courtyard by Melissa Thomson

Size: Mine! Approximately 31" bust
Yarn: Sublime baby cashmere merino silk 4 ply (50g/ 170m/ 184yds/ 75% extra fine merino/ 20% silk/ 5% cashmere) 2 skeins of white, 3.15 skeins of blue
Needles: Size 4 for body of sweater, Size 3 for ribbing, US G6/4.00mm crochet hook for armhole edging
 Anyway, there is way too much information about how I designed and knit my first sweater. Now all I have to do is come up with a good name for it. Any suggestions?

I was originally calling it Courtyard Tank after my inspiration and source of stitch pattern. Then I thought of the oh-so-exciting Boatneck Tank. But I want something better. Maybe one catchy word that captures it's essence. Would LOVE some suggestions (hint, hint)...
 And, of course, my boys decided to join the photo shoot. Got to love them!
5 comments:
It turned out so pretty!! And what a great accomplishment to be able to say you designed it yourself!
Hmm as for a name it reminds me of a honey comb... but not sure how to combine that with the inspirational pattern name.
I know you only want one word but it needs more. How about I TOTALLY ROCKED OUT THIS SWEATER or Itrots for short.
I'm always amazed at your creativity! Beautiful!!
Congratulations! It looks fantastic - you should be very proud, indeed.
I just found your blog and have been playing around. I love, love your detailed posts! I'm a mom of 3-year-old twins and like to play with patterns, stitches, but I'm mostly just a scarf experimenter so far!!! You are inspiring me to branch out.
Post a Comment