All of a sudden my creative juices are flowing and I have more ideas than I have time. (Thanks Pinterest!) Had to get some out of my head so I'm posting here.
Wreath of fall colored fabric flowers.
Fabric covered beaded necklace.
Fabric flower accessories.
Halloween costume (already got invited to a party and I can't wait).
Knitted lace bib necklace. Have seen some cool crochet ones, but not really knit ones. Need to chart out some stitch patterns from my old Vogue Knitting Stitch dictionary and play on paper before I can even consider casting on.
Lightweight knit sweater for B--yes, I think I'm finally ready to tackle that one. If I can only find the right yarn and afford a B's sweater amount of it.
Knit lace cowl. A long skinny continuous circle made up of a variety of lace/textured stitches. Probably in fingering weight. Lots of planning before I can do anything about this one.
Doubleknit coasters. Need to find or create a pattern. Never done doubleknitting, but it sounds interesting and I think the double thickness would be good for a coaster. I just started using a gauge swatch as a coaster because it was handy, but I think one made for this purpose would be even better. Maybe in grellow (gray and yellow <3).
Still want to knit a striped pullover with yarn I bought almost a year ago. Still need to design it. Trying to decide on neckline shape and stripe pattern. Here's my inspiration.
Just cast on for Folded. This is the perfect mindless knit so I can think of all my other ideas while knitting it :).
Wednesday, August 31, 2011
Monday, August 29, 2011
Movie Monday: Zoo Babies!
Apparently summer time is baby time at the zoo. We made a quick trip to the Dallas Zoo before the heat hit too badly yesterday and saw these little cuties.
Baby warthogs (Toby and Teddy) born June 13th:
Baby girl giraffe born in July:
 She's five weeks old and already 6 feet tall.
Baby flamingo:
 There are actually two baby flamingos (easily visible with their gray feathers).
Baby Colobus monkey born July 13th:
If you watch closely, you'll see the little white baby playing around the black and white adults.
Just had to share a little zoo baby cuteness this Monday morning. Happy Monday, everyone!
Saturday, August 27, 2011
Boys will be boys
My boys have two baby dolls. One was given to J by my mom on his first birthday. The other one J picked out at the dollar store when I was pregnant with N.
Every so often the boys will pull them out and play "baby." Since we don't have doll furniture, they have to be creative.
Here is the baby bed: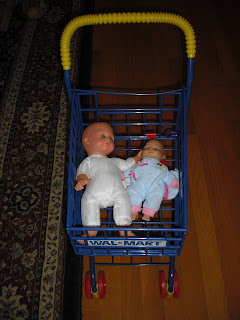
Here is the baby's hamper:

Got to love it!
Every so often the boys will pull them out and play "baby." Since we don't have doll furniture, they have to be creative.
Here is the baby bed:

Here is the baby's hamper:

Got to love it!
Friday, August 26, 2011
Lemongrass Island: AFTER
I took my Rock Island shawl and gave it bath in warm water and Eucalan (no rinse wool wash).

Rolled it in a towel to get out excess water. Stretched it out and pinned it in place with blocking wires and pins.
And now, in less than 24 hours, this:

Has become this:
But to really appreciate its beauty, you have to see the outside shots where you can really appreciate the pretty color of this yarn and the delicate nature of this shawl.


Pattern: Rock Island by Jared Flood
Yarn: less than one skein of Sunrise Fiber Co. Lace Silk Merino in Lemongrass (80% Merino/ 20% Silk/ 50g/ 656yds)
Needles: Size 7
Finished size: 48" (at widest point) by 22" (at deepest point) [relaxed after blocking]
Mods: I wanted a smaller shawl--so I might actually wear it. I only did 61 repeats of the lace edging and thus only had 248 YOs to create 251 stitches. Then I only did 4 sets of garter stitch decreases to get to 235 st to start the Rock Island lace chart. For the chart, I only did 14 repeats (instead of 17) of the six stitch repeat. After the Rock Island chart, I followed the pattern as written until I had 13 st. I then did this as my final decrease row: K2, K2tog, K1, SSK, K2, SSK, K2. This left me 10 stitches. I grafted them together (5 and 5) using the Kitchener st.
On Ravelry here.

Rolled it in a towel to get out excess water. Stretched it out and pinned it in place with blocking wires and pins.

And now, in less than 24 hours, this:

Has become this:

But to really appreciate its beauty, you have to see the outside shots where you can really appreciate the pretty color of this yarn and the delicate nature of this shawl.


Pattern: Rock Island by Jared Flood
Yarn: less than one skein of Sunrise Fiber Co. Lace Silk Merino in Lemongrass (80% Merino/ 20% Silk/ 50g/ 656yds)
Needles: Size 7
Finished size: 48" (at widest point) by 22" (at deepest point) [relaxed after blocking]
Mods: I wanted a smaller shawl--so I might actually wear it. I only did 61 repeats of the lace edging and thus only had 248 YOs to create 251 stitches. Then I only did 4 sets of garter stitch decreases to get to 235 st to start the Rock Island lace chart. For the chart, I only did 14 repeats (instead of 17) of the six stitch repeat. After the Rock Island chart, I followed the pattern as written until I had 13 st. I then did this as my final decrease row: K2, K2tog, K1, SSK, K2, SSK, K2. This left me 10 stitches. I grafted them together (5 and 5) using the Kitchener st.
On Ravelry here.
Well, I finally jumped on the bandwagon and joined Pinterest. For people who don't know about Pinterest, it is a place to create and save virtual pinboards. I have been avoiding it because I was scared of how much time I might spend on it, but I finally gave in. It's great. Now instead of bookmarking every knit pattern, inspiration piece, recipe or cool crafty idea, I can just "pin" them on one of my Pinterest boards. I love how easy it is to use. I love having access to the cool things I have found and the cool things others have found.
Anyway, being on Pinterest has made me want to do lots of crafty things. Two types of crafty things I've been seeing everywhere are felt and fabric flowers. I found and pinned a few tutorials and started playing. Here are the few I've done so far.
I found a really cool tutorial for felt flowers and made this one:
 This flower was SO easy to make and I think it is quite cute.
The person who made the tutorial, also made a really cool wreath covered in these flowers. I was thinking it would be fun to make a fall wreath. Then I remembered some cool fabric orange and white fabric I have and thought the fabric would look cool on a fall wreath. So I tried to use this method to make a fabric rose. My first attempt was a total fail--the fabric was too thin and one-sided. Then I tried gluing two circles of fabric together and that worked a little better:

I'm still not 100% satisfied. I decided to try a different technique for making a fabric flower. I looked at this tutorial and this one. I didn't follow either of them exactly, but ended up with this on my first try:
Besides the fact that this fabric is boring (didn't want to use up any good fabric while I learned the ropes), I think this turned out pretty cute. Not sure if this method will really show off the cuteness of the fabric I wanted to use. Will have to play more with size of fabric strip I use (width and length). I also need to decide if I want to use the glue method or sewn together method. Mine right now are just folded together but not held together with anything. I did one last attempt with a more interesting fabric and here it is:

I only folded my fabric in half once because I like a little bit of the raw edge to show. I think it adds interest.
Anyway, that is my craftiness for now. If you are on Pinterest or decide to join, let me know so I can follow you and be inspired by what inspires you :). You can follow me too if you want.
Anyway, being on Pinterest has made me want to do lots of crafty things. Two types of crafty things I've been seeing everywhere are felt and fabric flowers. I found and pinned a few tutorials and started playing. Here are the few I've done so far.
I found a really cool tutorial for felt flowers and made this one:
 This flower was SO easy to make and I think it is quite cute.
The person who made the tutorial, also made a really cool wreath covered in these flowers. I was thinking it would be fun to make a fall wreath. Then I remembered some cool fabric orange and white fabric I have and thought the fabric would look cool on a fall wreath. So I tried to use this method to make a fabric rose. My first attempt was a total fail--the fabric was too thin and one-sided. Then I tried gluing two circles of fabric together and that worked a little better:

I'm still not 100% satisfied. I decided to try a different technique for making a fabric flower. I looked at this tutorial and this one. I didn't follow either of them exactly, but ended up with this on my first try:

Besides the fact that this fabric is boring (didn't want to use up any good fabric while I learned the ropes), I think this turned out pretty cute. Not sure if this method will really show off the cuteness of the fabric I wanted to use. Will have to play more with size of fabric strip I use (width and length). I also need to decide if I want to use the glue method or sewn together method. Mine right now are just folded together but not held together with anything. I did one last attempt with a more interesting fabric and here it is:

I only folded my fabric in half once because I like a little bit of the raw edge to show. I think it adds interest.
Anyway, that is my craftiness for now. If you are on Pinterest or decide to join, let me know so I can follow you and be inspired by what inspires you :). You can follow me too if you want.
Thursday, August 25, 2011
Lemongrass Island: BEFORE
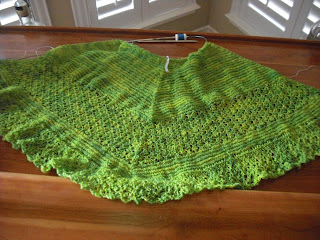
Finished knitting my lace shawl! Here it is:

My Lemongrass Island!
Okay, so it doesn't look like much yet. But just wait to until I block it. Then the magic happens.
AFTER pictures coming soon.

My Lemongrass Island!

Okay, so it doesn't look like much yet. But just wait to until I block it. Then the magic happens.
AFTER pictures coming soon.
Wednesday, August 24, 2011
WIP: Rock Island
Although J's starting Kindergarten has been the focus of our household this week (and the last few to be honest), I am still knitting when I get a chance. I've been getting up early and thus heading to bed early so not doing as much knitting as I would like. However I am still making progress on my lace shawl, Rock Island, or as I've renamed mine Lemongrass Island.
This is where I am now.
I am making mine on Size 7 needles to meet gauge. But I wanted mine slightly smaller than the original pattern, so I did 61 instead of 71 repeats of the lace edging. Picking up stitches into YO loops took much longer than I expected. Some of my loops were obvious and some were not. Had 248 YOs [2 + 244 (61 x 4) + 2] and picked up 251 stitches (increasing 3 in middle 4 stitches as suggested). I realized that I needed to do just 4 sets of the two garter stitch rows (a total of 16 stitches decreased) to get the correct stitch count to start the Rock Island chart. After these rows I had 235 stitches to start Rock Island chart. I followed the chart as written except did the 6 stitch repeat 14 times (instead of 17). I messed up the Rock Island chart a few times early on and had to redo those rows. I then highlighted the SSKs and soon memorized the pattern. After that, it was smooth sailing. I have since finished the Rock Island chart and am slowly working my way through the garter stitch decrease rows. I have about 40 more rows to go. Can't wait to finish and block. This shawl is BEAUTIFUL after blocking.
This is where I am now.

I am making mine on Size 7 needles to meet gauge. But I wanted mine slightly smaller than the original pattern, so I did 61 instead of 71 repeats of the lace edging. Picking up stitches into YO loops took much longer than I expected. Some of my loops were obvious and some were not. Had 248 YOs [2 + 244 (61 x 4) + 2] and picked up 251 stitches (increasing 3 in middle 4 stitches as suggested). I realized that I needed to do just 4 sets of the two garter stitch rows (a total of 16 stitches decreased) to get the correct stitch count to start the Rock Island chart. After these rows I had 235 stitches to start Rock Island chart. I followed the chart as written except did the 6 stitch repeat 14 times (instead of 17). I messed up the Rock Island chart a few times early on and had to redo those rows. I then highlighted the SSKs and soon memorized the pattern. After that, it was smooth sailing. I have since finished the Rock Island chart and am slowly working my way through the garter stitch decrease rows. I have about 40 more rows to go. Can't wait to finish and block. This shawl is BEAUTIFUL after blocking.
Turtle
N has decided that he is a turtle. Even with our 108+F days, he insists on sleeping totally encased in his quilt.

He gets so wrapped up in there that I worry he can't breath. He wakes up drenched in sweat. I have to wash his quilt about every three days (it's actually a bit gross). But he is a happy little turtle.
Since J started Kindergarten this week, we have all been getting up early. We have to leave the house at 7:30AM. I've had to wake N up over an hour before he usually wakes up on his own. Needless to say, he is a bit tired. Yesterday when I went to wake him up from his nap, I found encased in his quilt (see picture above).
I got him unwrapped (see picture below).

And he was STILL sound asleep. Oh, my little turtle is tried. Glad he's got two more weeks to adjust before he heads to preschool.
Monday, August 22, 2011
It's official
J started Kindergarten today. I was not worried about him growing up or sad that my little guy was starting real school. I was just really anxious that he would cry or get upset, but he did great. No tears. No clinging. No begging me to stay. I was SO relieved.
Here are some pics on our way in school. The first one he is in mid-blink. The second one is blurry.
 I stopped after two because I didn't want to harass him before his first day of Kindergarten. I was very proud that I let him wear his new Lego Star Wars t-shirt and not the polo and plaid shorts I wanted him to wear.
After school, we met some friends at Sonic for milkshakes. One of my friends was kind of enough to take this sweaty pic.

All in all, a good day. Hope the rest of the week goes as well.
Oh yeah, and I joined the PTA. Wish me luck :).
Here are some pics on our way in school. The first one he is in mid-blink. The second one is blurry.

 I stopped after two because I didn't want to harass him before his first day of Kindergarten. I was very proud that I let him wear his new Lego Star Wars t-shirt and not the polo and plaid shorts I wanted him to wear.
After school, we met some friends at Sonic for milkshakes. One of my friends was kind of enough to take this sweaty pic.

All in all, a good day. Hope the rest of the week goes as well.
Oh yeah, and I joined the PTA. Wish me luck :).
Wednesday, August 17, 2011
Photo Highlights of a Fun Visit
Just got back from another fun visit back to Ohio. Got to spend quality time with B's parents and brother and I got to go out with my good "mom friends" there. Didn't get to see extended family or old neighbors or co-workers as this was a short visit. Hope to catch up with them next time. Here are some of my favorite photos from the trip:
 On the hammock with Grandpa.
 At Memphis Kiddie Park, Grandma and N on the roller coaster.
 J (with me) on the roller coaster.
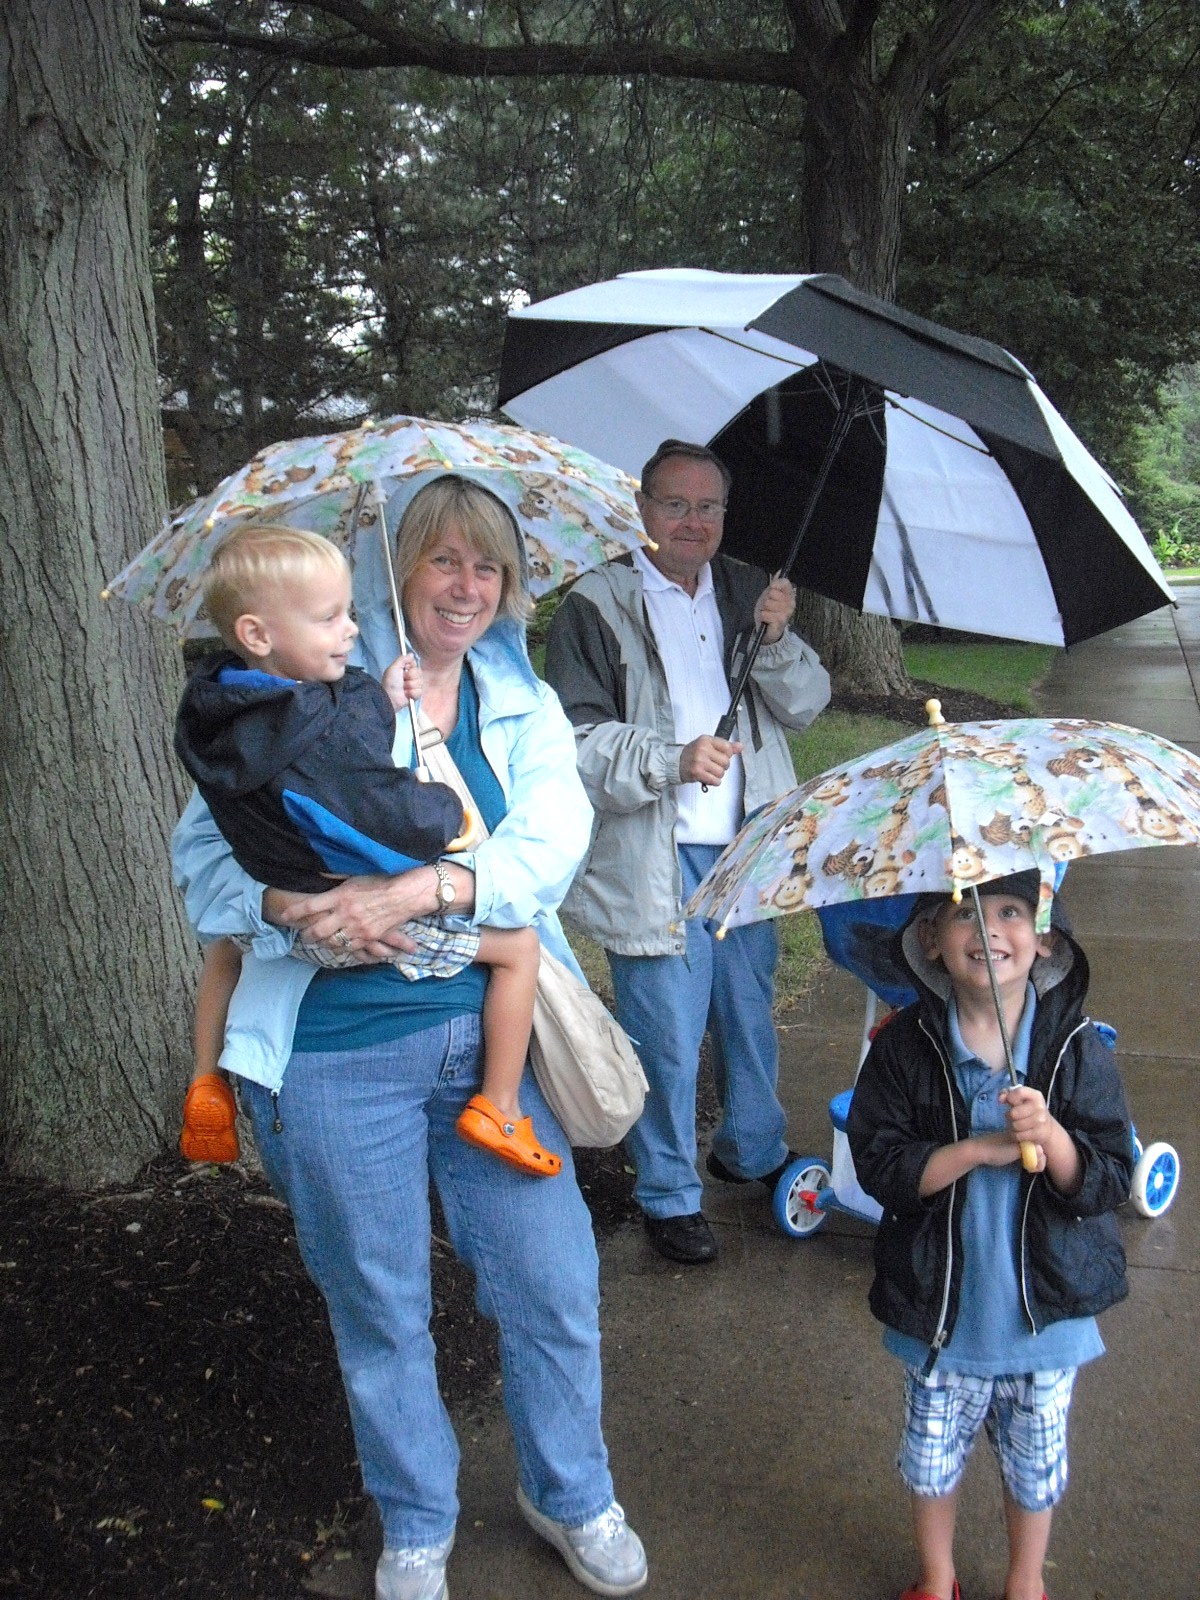
 A rainy day at the Cleveland Zoo.
 Camel ride.
 This koala was actually awake and moving around! Since they sleep 20 or more hours a day, this was pretty exciting to see.
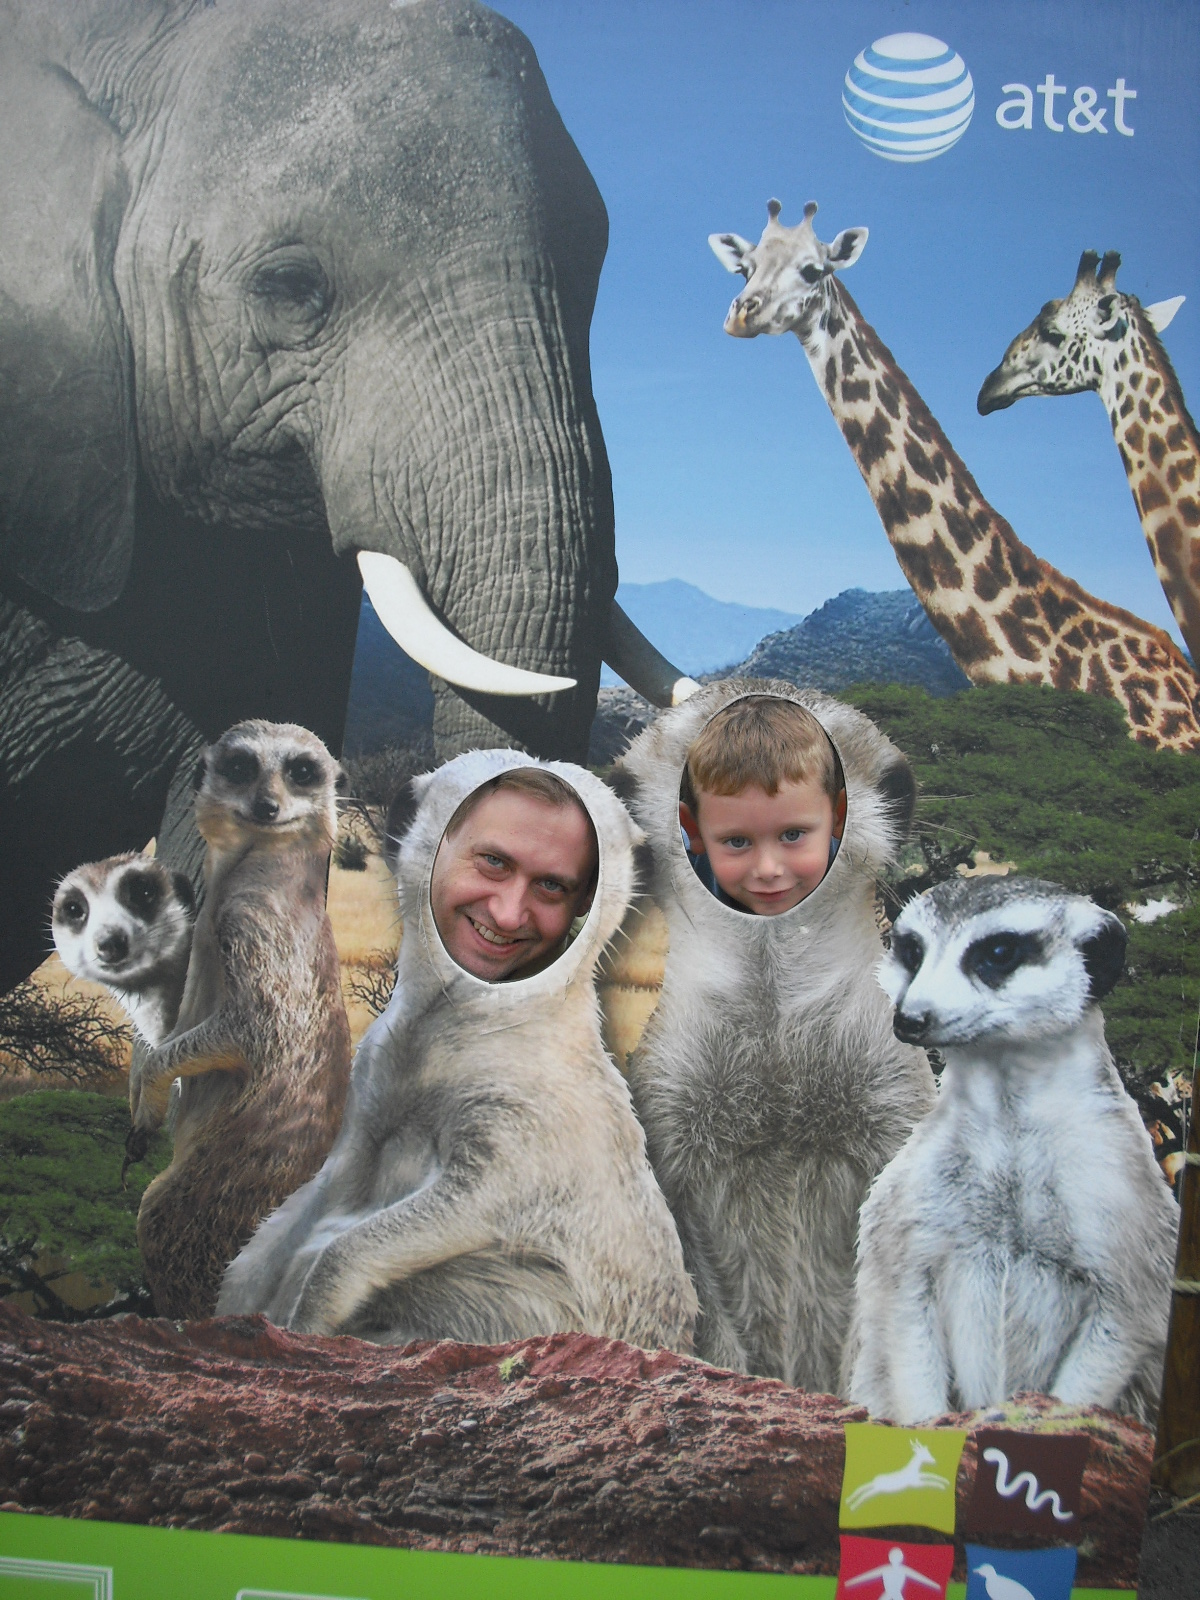
 Uncle Mike and J as meerkats.
 Using our umbrellas at the zoo. The boys LOVED their new umbrellas.
 At the Natural History museum. Dinosaurs!
 The boys loved this "Little Builders" exhibit at the museum.

So much fun!
Then we came home and I got this:

From the best husband EVER! Yes, my husband made French Silk Pie--and didn't eat any until we got home.
Life is good.
 On the hammock with Grandpa.
 At Memphis Kiddie Park, Grandma and N on the roller coaster.
 J (with me) on the roller coaster.
 A rainy day at the Cleveland Zoo.
 Camel ride.
 This koala was actually awake and moving around! Since they sleep 20 or more hours a day, this was pretty exciting to see.
 Uncle Mike and J as meerkats.
 Using our umbrellas at the zoo. The boys LOVED their new umbrellas.
 At the Natural History museum. Dinosaurs!
 The boys loved this "Little Builders" exhibit at the museum.

So much fun!
Then we came home and I got this:

From the best husband EVER! Yes, my husband made French Silk Pie--and didn't eat any until we got home.
Life is good.
Friday, August 12, 2011
Happy Anniversary, Love
Today is my 11 year wedding anniversary.
One of the lines in a current favorite song is "you put your arms around me and I'm home."
Whenever I hear it, I think of B. I've been in his arms for the last 11 years and I can't think of anywhere I'd rather be.
Happy Anniversary, Love.
One of the lines in a current favorite song is "you put your arms around me and I'm home."
Whenever I hear it, I think of B. I've been in his arms for the last 11 years and I can't think of anywhere I'd rather be.
Happy Anniversary, Love.
Thursday, August 11, 2011
So I don't forget...
B and J have been playing Indian Jones on the Wii recently (thanks to the lovely people who post videos of how to move to the next level on YouTube). Anyway, each time they play J insists that B be Indiana so he can be Jones. No matter how much we talk about it J can't be convinced that Indiana Jones is one person. Anyway, it cracks me up. Just had to post so I didn't forget.
Rock Island: Work in Progress
I could not resist my new Sunshine Fiber Co. Lace Merino Silk. I'm already knitting with it.
I enjoy knitting lace, but I am not a person who wears shawls so I often pass on many of the "in" projects for lace knitters. But when I saw Rock Island by Jared Flood, I was tempted. It's a lace shawl, but it is so delicate and beautiful and modern that I was having trouble resisting. I was doing just fine until I realized my new yarn is just enough yardage for this project and then I caved.
I swatched on Tuesday night and although I had just bought lovely size 6 lace needles from my local yarn shop (the size recommended in the pattern)--it turns out I needed to move up to size 7 to get gauge--even after blocking. :(. I thought about using the size 6s anyway as I wouldn't mind a smaller shawl, but decided not to as the open, airy look of the shawl is part of what attracted me to it. I am sad to not get to use my new needles, but so far my old size 7 bamboo needles are working just fine.

Rock Island starts with 71 repeats of a 8 row lace edging. I have completed 14 repeats so far and am getting into a good rhythm. From everyone's comments on Ravelry, the edging is the hardest part. One thing I've done to help me are adding a "lifeline" at the end of each repeat (the purple yarn in the picture). This way if I make a mistake, I can just go back to the beginning of that 8 row repeat and know that all stitches are on the needle correctly. I made a few errors early on (a few forgotten yarn ons) and when I worked back, I felt undoing the SSKs was right fiddly--thus my addition of the lifeline. Hopefully I didn't mess anything up in those early repeats as I've now gone far enough that I don't want to go back. I am also using a magnetic board with magnets to hold my chart and isolate the row I am working on. I am also using a counter to keep track of how many repeats I've completed.
People were complaining about the difficulty of reading the chart and keeping K2tog and SSK straight. I've realized that all right side rows start with a YO and a K2tog. Then rows 1 and 3 switch to SSK. Rows 2 and 4 are all K2tog. Rows 5 and 7 are all K2tog. Rows 6 and 8 are all SSK. Because of the yarn overs at the beginning of each right side row (they make little loops that stick out), it is easy to tell if you are on the right side or wrong side.
Anyway, as in all lace, the pattern has some logic to it that helps make it easier to remember. This edging is done in garter stitch which is harder for me to read than stockinette lace so I'm glad to have my aids to keep it straight. Anyway, I am enjoying knitting this so far. Can't wait to see this lovely lace all blocked out. It is amazing what blocking does to lace!
Monday, August 8, 2011
Worthy
Finally...

I have yarn worthy of photos and "stash"ing on Ravelry. This yummy yarn is Lace Silk Merino from Sunrise Fiber Co. I bought it with a Heartsy voucher (so I got this little lovely for only $8) and I am in love.
This colorway is Lemongrass. One skein of Lace Silk Merino (80% superfine merino/ 20% silk) is 655 yards of yummy lace weight yarn.
I plan to use it to make Jared Flood's Rock Island. Can't wait!
Just had to share.
Oh, just noticed Wren added this new colorway of Lace Silk Merino. Hmm... Must add that to my wish list.

I have yarn worthy of photos and "stash"ing on Ravelry.
 This yummy yarn is Lace Silk Merino from Sunrise Fiber Co. I bought it with a Heartsy voucher (so I got this little lovely for only $8) and I am in love.
This colorway is Lemongrass. One skein of Lace Silk Merino (80% superfine merino/ 20% silk) is 655 yards of yummy lace weight yarn.
I plan to use it to make Jared Flood's Rock Island. Can't wait!
Just had to share.
Oh, just noticed Wren added this new colorway of Lace Silk Merino. Hmm... Must add that to my wish list.
Finished! My First Sweater Design
I did it! I can't believe I actually did it! I knitted a sweater from a pattern I designed myself and I LOVE it! I feel like a little kid on Christmas morning!

A few months ago I saw a hat (Courtyard) on Ravelry that I just fell in love with. Well, not the hat exactly, but the stitch pattern. I loved the cool hourglass-shaped twisted stitch pattern. So I bought the pattern, knit the hat and decided that I needed to knit a sweater in this stitch pattern.

 I've read a number of books on knitting and designing your own knits. All of which, I referred to during this process. My favorites are:
Knitwear design Workshop by Shirley Paden
Custom Knits by Wendy Bernard
Knitting from the Top by Barbara G. Walker
I love knitting in the round and top-down which is what both Wendy and Barbara teach. Shirley's designs all focus on knitting in pieces and usually bottom-up, but her attention to detail and using math really helped me a lot.
Anyway, I originally pictured a long-sleeve sweater in the same color scheme as my hat (golden yellow and white). However, I just couldn't figure out how to make this stitch pattern cooperate for a raglan and I just didn't feel like messing with set-in sleeves--so I decided to knit a boatneck tank. I also decided to knit in the round and from the bottom up. Although I often prefer top-down, bottom-up seemed to make more sense with this stitch pattern and style.
Next came the search for yarn. I just couldn't find yarn that I loved in the golden yellow and white (and suitable for a boatneck tank). Finally, as I perused my local yarn shop for the umpteenth time, I found the yarn: Sublime baby cashmere merino silk 4 ply. It is so soft (perfect for wearing next to bare skin) and lightweight (perfect for a summer tank). This was a step outside my comfort zone as I don't usually knit with anything quite this nice, but it worked out beautifully. I chose a white and a very pale greenish blue.
My next step was making a huge swatch (7 inches by 15 inches) knit in the round like my sweater.

Next, I looked through my shirts to find one with a fit I loved and that would work well for a model for my tank. I have a boatneck 3/4 sleeve shirt from Gap that I love and I decided to use it for measurements. I measured the shirt's width at the bottom hem and then continued measuring the width at one inch intervals until I reached the top of the shirt. I made note of armhole location as well. I kept these measurements with me throughout the process and they served as a sort of schematic for me.
Next, I did lots of math. I had already found my gauge from my giant swatch (8 st per inch and 10 rows per inch). I figured out how many stitches I needed to cast on (for the ribbing). I had decided to do a K2, P3 ribbing (instead of my original K2, P2 ribbing on my swatch) so that the bottom did not pull in. I figured out that I could simply decrease on the first row after ribbing to get everything to line up nicely from the ribbing to the twisted stitch pattern. After I figured out my cast on number and how to transition from the ribbing to the stitch pattern, I started working out where and how my decreases and increases would work. I even charted out the pattern to see how the decreases/increases would affect the flow of that part of the stitch pattern. I was lucky in that my stitch gauge was 8 stitches. Thus I had to decrease 4 stitches to decrease 1/2 inch or just 2 stitches to decrease 1/4 inch. My row gauge worked out to 10 rows per inch which was perfect as the stitch pattern was split into two 10 row repeats.
At this point, I just had to cast on and start knitting. So I knitted up to the armholes and then stopped to figure out the math for the armholes. I used Shirley Paden's Knitwear Design Workshop to help me. I was really nervous about it, but finally just did it and it worked out great. At this point, I had to switch to knitting back and forth. I thought this was going to make me end up with lots of ends to weave in because the pattern alternates between using the blue yarn one row and then the white the next and then the blue again, etc. This is no biggie when working in the round, you just leave the yarn and then carry it up after the next row. But when knitting flat, suddenly the yarn is at the wrong end of the row when you need it. After cutting ends for a few rows, I suddenly realized that I could just knit back when the yarn was on the wrong end. So I would do two rows right to left and then two rows left to right and then repeat. Very exciting to not have all those ends to weave in!
Finally, I approached the finish line--the top neck! I knew that I wanted a little bit of shaping, but not too much. I decided to do short rows on the outside edges of the front to give a slight dip without changing the pattern too much. I made sure that I got to a point in the stitch pattern where things were worked even so I didn't have to work twisted stitches in my short rows. I did about one inch ribbing on the top to match the ribbing on the bottom. I increased before the ribbing to do K2, P3 again. Ribbing was done on a smaller needle as well. For the back, I knit as the front except that I knit 10 more rows in pattern and no short rows. This raised the back neck up enough that the front wasn't too high. If I knit this again, I might do 2-4 less rows in the back. I think it might be a tad high. Finally I did a three needle bind off to join the top at the shoulders and a regular bind off across the front and back necks.

Now I had unfinished armholes to deal with. The fabric was too flimsy (because of slipped stitches right at the very edge of the armhole) to pick up stitches evenly. I was at a lost at first because I had originally planned a row or two of ribbing or a single crochet stitch edging. But both looked too messy with the loose slipped stitch fabric. What I ended up doing was knitting a crochet chain directly onto the front surface of the armhole. I used the blue yarn doubled and a medium sized crochet hook. I put the crochet hook directly through the fabric at the edge of the armhole, picked up a loop of yarn and pulled it through. I did this all around the armhole and am happy with the results.

Pattern: My own!
Stitch pattern from: Courtyard by Melissa Thomson

Size: Mine! Approximately 31" bust
Yarn: Sublime baby cashmere merino silk 4 ply (50g/ 170m/ 184yds/ 75% extra fine merino/ 20% silk/ 5% cashmere) 2 skeins of white, 3.15 skeins of blue
Needles: Size 4 for body of sweater, Size 3 for ribbing, US G6/4.00mm crochet hook for armhole edging
 Anyway, there is way too much information about how I designed and knit my first sweater. Now all I have to do is come up with a good name for it. Any suggestions?

I was originally calling it Courtyard Tank after my inspiration and source of stitch pattern. Then I thought of the oh-so-exciting Boatneck Tank. But I want something better. Maybe one catchy word that captures it's essence. Would LOVE some suggestions (hint, hint)...
 And, of course, my boys decided to join the photo shoot. Got to love them!

A few months ago I saw a hat (Courtyard) on Ravelry that I just fell in love with. Well, not the hat exactly, but the stitch pattern. I loved the cool hourglass-shaped twisted stitch pattern. So I bought the pattern, knit the hat and decided that I needed to knit a sweater in this stitch pattern.

Knitwear design Workshop by Shirley Paden
Custom Knits by Wendy Bernard
Knitting from the Top by Barbara G. Walker
I love knitting in the round and top-down which is what both Wendy and Barbara teach. Shirley's designs all focus on knitting in pieces and usually bottom-up, but her attention to detail and using math really helped me a lot.
Anyway, I originally pictured a long-sleeve sweater in the same color scheme as my hat (golden yellow and white). However, I just couldn't figure out how to make this stitch pattern cooperate for a raglan and I just didn't feel like messing with set-in sleeves--so I decided to knit a boatneck tank. I also decided to knit in the round and from the bottom up. Although I often prefer top-down, bottom-up seemed to make more sense with this stitch pattern and style.
Next came the search for yarn. I just couldn't find yarn that I loved in the golden yellow and white (and suitable for a boatneck tank). Finally, as I perused my local yarn shop for the umpteenth time, I found the yarn: Sublime baby cashmere merino silk 4 ply. It is so soft (perfect for wearing next to bare skin) and lightweight (perfect for a summer tank). This was a step outside my comfort zone as I don't usually knit with anything quite this nice, but it worked out beautifully. I chose a white and a very pale greenish blue.
My next step was making a huge swatch (7 inches by 15 inches) knit in the round like my sweater.

Next, I looked through my shirts to find one with a fit I loved and that would work well for a model for my tank. I have a boatneck 3/4 sleeve shirt from Gap that I love and I decided to use it for measurements. I measured the shirt's width at the bottom hem and then continued measuring the width at one inch intervals until I reached the top of the shirt. I made note of armhole location as well. I kept these measurements with me throughout the process and they served as a sort of schematic for me.
Next, I did lots of math. I had already found my gauge from my giant swatch (8 st per inch and 10 rows per inch). I figured out how many stitches I needed to cast on (for the ribbing). I had decided to do a K2, P3 ribbing (instead of my original K2, P2 ribbing on my swatch) so that the bottom did not pull in. I figured out that I could simply decrease on the first row after ribbing to get everything to line up nicely from the ribbing to the twisted stitch pattern. After I figured out my cast on number and how to transition from the ribbing to the stitch pattern, I started working out where and how my decreases and increases would work. I even charted out the pattern to see how the decreases/increases would affect the flow of that part of the stitch pattern. I was lucky in that my stitch gauge was 8 stitches. Thus I had to decrease 4 stitches to decrease 1/2 inch or just 2 stitches to decrease 1/4 inch. My row gauge worked out to 10 rows per inch which was perfect as the stitch pattern was split into two 10 row repeats.
At this point, I just had to cast on and start knitting. So I knitted up to the armholes and then stopped to figure out the math for the armholes. I used Shirley Paden's Knitwear Design Workshop to help me. I was really nervous about it, but finally just did it and it worked out great. At this point, I had to switch to knitting back and forth. I thought this was going to make me end up with lots of ends to weave in because the pattern alternates between using the blue yarn one row and then the white the next and then the blue again, etc. This is no biggie when working in the round, you just leave the yarn and then carry it up after the next row. But when knitting flat, suddenly the yarn is at the wrong end of the row when you need it. After cutting ends for a few rows, I suddenly realized that I could just knit back when the yarn was on the wrong end. So I would do two rows right to left and then two rows left to right and then repeat. Very exciting to not have all those ends to weave in!
Finally, I approached the finish line--the top neck! I knew that I wanted a little bit of shaping, but not too much. I decided to do short rows on the outside edges of the front to give a slight dip without changing the pattern too much. I made sure that I got to a point in the stitch pattern where things were worked even so I didn't have to work twisted stitches in my short rows. I did about one inch ribbing on the top to match the ribbing on the bottom. I increased before the ribbing to do K2, P3 again. Ribbing was done on a smaller needle as well. For the back, I knit as the front except that I knit 10 more rows in pattern and no short rows. This raised the back neck up enough that the front wasn't too high. If I knit this again, I might do 2-4 less rows in the back. I think it might be a tad high. Finally I did a three needle bind off to join the top at the shoulders and a regular bind off across the front and back necks.

Now I had unfinished armholes to deal with. The fabric was too flimsy (because of slipped stitches right at the very edge of the armhole) to pick up stitches evenly. I was at a lost at first because I had originally planned a row or two of ribbing or a single crochet stitch edging. But both looked too messy with the loose slipped stitch fabric. What I ended up doing was knitting a crochet chain directly onto the front surface of the armhole. I used the blue yarn doubled and a medium sized crochet hook. I put the crochet hook directly through the fabric at the edge of the armhole, picked up a loop of yarn and pulled it through. I did this all around the armhole and am happy with the results.

Pattern: My own!
Stitch pattern from: Courtyard by Melissa Thomson

Size: Mine! Approximately 31" bust
Yarn: Sublime baby cashmere merino silk 4 ply (50g/ 170m/ 184yds/ 75% extra fine merino/ 20% silk/ 5% cashmere) 2 skeins of white, 3.15 skeins of blue
Needles: Size 4 for body of sweater, Size 3 for ribbing, US G6/4.00mm crochet hook for armhole edging
 Anyway, there is way too much information about how I designed and knit my first sweater. Now all I have to do is come up with a good name for it. Any suggestions?

I was originally calling it Courtyard Tank after my inspiration and source of stitch pattern. Then I thought of the oh-so-exciting Boatneck Tank. But I want something better. Maybe one catchy word that captures it's essence. Would LOVE some suggestions (hint, hint)...
 And, of course, my boys decided to join the photo shoot. Got to love them!
Friday, August 5, 2011
A Fun Visit (and a Review of Legoland Discovery Center)
My good friend Nicole just came for a weeklong visit with her 5 year-old son Will. Nicole and I have been friends since college and have gotten even closer after Will and J were born two weeks apart. Then I moved to Texas (Nicole lives in Austin) and our friendship grew even stronger.
 J, Nicole and Will at the entrance to Legoland Discovery Center.
Anyway, Nicole and Will have come for several visits since we moved here and each one is great fun. This week our plans were slightly altered by the 108F and higher temps. The zoo was ruled out as too darn hot. We ended up heading to Legoland Discovery Center in Grapevine instead. Both J and Will are Lego fans and we had never been so we decided to check it out. We were a little nervous because the online tickets were sold out for the morning. (They sell discounted tickets online but only a limited number per hour). We got there right at ten and it was perfect. We only had to wait a few minutes before entering the fun.
After a short interactive tour of a Dr. Seuss-like miniature Lego factory where we learned how Legos are made, we got in line for the Kingdom Quest ride. This ride involves shooting Lego bad guys with your laser gun while trying to come to the princess's rescue. The only chance to ride it is right as you come in and in fact they syphon all guests through this ride before they enter the main area. It was dark and N thought it looked scary so just Nicole, Will and J rode it. After the ride and a chance to buy a keychain photo of ourselves on the ride (which we passed up), we entered the main play area. In the center of it is the Lego City Playland, a huge enclosed play structure--kind of like a Lego-themed McDonald's play structure on steroids. The boys played in it for a bit, but spent less time in the play area than I expected.
Our next stop was Miniland. This is really cool. It's a whole miniature city built from Legos--and, of course, this one was Dallas-themed complete with the Dallas skyline, airport, Cowboys' stadium, Rangers ballpark, Forth Worth Stockyards and even Southfork Ranch. Each area had a button you could push to make something move and come alive.
 N especially loved the airport.
 J and Will checked out the Dallas Cowboy Stadium.
I had heard that Miniland was more adult-oriented, but our boys really liked it a lot.
Our next stop was the Lego Racers: Build and Test Zone. They have lots of little building stations with buckets of wheels, axles and blocks for building cars. Then there are three steep ramps to race them down and another race ramp complete with start button and finish line.
 Will was our most serious builder and spent a lot of time carefully building cars. N and J built quickly and raced over and over.
 I had to lift N up to reach the ramp. J could just barely see over it. They both loved it even though their cars often fell apart during the "race."

Next we moved to the Duplo Village complete with a smaller play structure that looked like a barn complete with a spiral slide and large animals made out of Legos that resembled the Duplo zoo animals. Duplo Village is specifically for children age 2 to 5 years. N and J (especially N) had a lot of fun in the barn (climbing up and then sliding down the slide), but the biggest hit in this area for our boys were the giant Lego building blocks. They are soft and rubbery and the boys really enjoyed building with them.
 N and J built a tower while Will worked on a giraffe.
At some point, we stopped and had a snack. We brought our own and this seemed to be pretty common. We didn't see anything posted about outside food, but we saw multiple people snacking on food that did not appear to be purchased at the Lego Cafe.
Our next adventure was the 4D Cinema. The Cinema was playing three movies that day in a constant rotation. As soon as one ended, they cleared the theater and started the next one. Each was about 15 minutes long and we watched two of the three. This was our first 4D experience and it was a fun one. When we got wet for the first time, it was a bit of a surprise. When it started snowing in the theater, the boys were really excited--a nice change from the 108F temps outside. J found the Spellbinder movie to be a little scary, but Chase Powers was a huge hit.
 Right before the movie started. We were at the end of the line for this movie so we got front row seats.
The movies really were a lot of fun and it was nice that you could pop in line and see one whenever you felt the urge since they were playing constantly. There is a timer outside the theater displaying the name of the next movie and a countdown until the start of the next movie (always 15 minutes or less).
At some point during the day of fun, we attempted to ride the second ride at Legoland Discovery Place--Merlin's Apprentice. This wizard-themed ride looked fun, but the line was long and with only 12 people fitting on the ride per turn (6 groups of 2) it moved very slowly. Also part of the issue, children under 4 feet tall have to ride with an adult. We had three children and only two adults so it didn't really work out for us. I don't think our children cared too much. They were having too much fun in the rest of the place.
Another favorite stop for our boys was a building area that didn't even have a name. It had four building spaces where you could build a structure. Then you turned on the "earthquake" complete with controls to change its strength to see if your structure would stay or fall down. The boys LOVED it. First, they just did it to see things fall, but then they worked to try to build a strong building.
 J is ready to see this structure shake and fall down.
 N anxiously watching to see if his tower will withstand the shaking.
We were at Legoland Discovery Center until 1PM when we left to walk over to the mall food court for lunch (Legoland Discovery Center is inside Grapevine Mills mall and next to the new Sea Life aquarium). We didn't do everything at LDC (we skipped the Lego Girls Princess Palace and Merlin's Apprentice), but did do everything we wanted to do. We had time to return to things we liked and had a lot of fun. In general, although there were a lot of people there, we did not feel overcrowded or like we were stuck waiting for something. The ride had lines and sometimes the movie line was long, but other areas seemed good. When we left the mall at 2PM (after lunch and a quick visit to the Lego shop), the line to get into Lego Discovery Center was long. I am glad we came right at 10AM like we did.
Overall impression: Legoland Discovery Center is fun with a good amount to do. I feel there are a good variety of activities fit into a relatively small place. I also feel there is a good mix of things that a variety of ages would enjoy. However, it is pricey. It cost me over $50 for myself and my two boys. It was worth it to have this experience with our visiting friends, but we will not be able to make this a regular hangout. My advice: go early and plan to stay as long as you can to get your money's worth.
Sorry for the travelogue description. I just know I've been wondering about this place and found a similar blog description helpful in my choice to go.
Nicole and Will went home today after a wonderful week of fun. I miss them already! So glad we got to have this time together including a great trip to Legoland Discovery Center!
 J, Nicole and Will at the entrance to Legoland Discovery Center.
Anyway, Nicole and Will have come for several visits since we moved here and each one is great fun. This week our plans were slightly altered by the 108F and higher temps. The zoo was ruled out as too darn hot. We ended up heading to Legoland Discovery Center in Grapevine instead. Both J and Will are Lego fans and we had never been so we decided to check it out. We were a little nervous because the online tickets were sold out for the morning. (They sell discounted tickets online but only a limited number per hour). We got there right at ten and it was perfect. We only had to wait a few minutes before entering the fun.
After a short interactive tour of a Dr. Seuss-like miniature Lego factory where we learned how Legos are made, we got in line for the Kingdom Quest ride. This ride involves shooting Lego bad guys with your laser gun while trying to come to the princess's rescue. The only chance to ride it is right as you come in and in fact they syphon all guests through this ride before they enter the main area. It was dark and N thought it looked scary so just Nicole, Will and J rode it. After the ride and a chance to buy a keychain photo of ourselves on the ride (which we passed up), we entered the main play area. In the center of it is the Lego City Playland, a huge enclosed play structure--kind of like a Lego-themed McDonald's play structure on steroids. The boys played in it for a bit, but spent less time in the play area than I expected.
Our next stop was Miniland. This is really cool. It's a whole miniature city built from Legos--and, of course, this one was Dallas-themed complete with the Dallas skyline, airport, Cowboys' stadium, Rangers ballpark, Forth Worth Stockyards and even Southfork Ranch. Each area had a button you could push to make something move and come alive.
 N especially loved the airport.
 J and Will checked out the Dallas Cowboy Stadium.
I had heard that Miniland was more adult-oriented, but our boys really liked it a lot.
Our next stop was the Lego Racers: Build and Test Zone. They have lots of little building stations with buckets of wheels, axles and blocks for building cars. Then there are three steep ramps to race them down and another race ramp complete with start button and finish line.
 Will was our most serious builder and spent a lot of time carefully building cars. N and J built quickly and raced over and over.
 I had to lift N up to reach the ramp. J could just barely see over it. They both loved it even though their cars often fell apart during the "race."
Next we moved to the Duplo Village complete with a smaller play structure that looked like a barn complete with a spiral slide and large animals made out of Legos that resembled the Duplo zoo animals. Duplo Village is specifically for children age 2 to 5 years. N and J (especially N) had a lot of fun in the barn (climbing up and then sliding down the slide), but the biggest hit in this area for our boys were the giant Lego building blocks. They are soft and rubbery and the boys really enjoyed building with them.
 N and J built a tower while Will worked on a giraffe.
At some point, we stopped and had a snack. We brought our own and this seemed to be pretty common. We didn't see anything posted about outside food, but we saw multiple people snacking on food that did not appear to be purchased at the Lego Cafe.
Our next adventure was the 4D Cinema. The Cinema was playing three movies that day in a constant rotation. As soon as one ended, they cleared the theater and started the next one. Each was about 15 minutes long and we watched two of the three. This was our first 4D experience and it was a fun one. When we got wet for the first time, it was a bit of a surprise. When it started snowing in the theater, the boys were really excited--a nice change from the 108F temps outside. J found the Spellbinder movie to be a little scary, but Chase Powers was a huge hit.
 Right before the movie started. We were at the end of the line for this movie so we got front row seats.
The movies really were a lot of fun and it was nice that you could pop in line and see one whenever you felt the urge since they were playing constantly. There is a timer outside the theater displaying the name of the next movie and a countdown until the start of the next movie (always 15 minutes or less).
At some point during the day of fun, we attempted to ride the second ride at Legoland Discovery Place--Merlin's Apprentice. This wizard-themed ride looked fun, but the line was long and with only 12 people fitting on the ride per turn (6 groups of 2) it moved very slowly. Also part of the issue, children under 4 feet tall have to ride with an adult. We had three children and only two adults so it didn't really work out for us. I don't think our children cared too much. They were having too much fun in the rest of the place.
Another favorite stop for our boys was a building area that didn't even have a name. It had four building spaces where you could build a structure. Then you turned on the "earthquake" complete with controls to change its strength to see if your structure would stay or fall down. The boys LOVED it. First, they just did it to see things fall, but then they worked to try to build a strong building.
 J is ready to see this structure shake and fall down.
 N anxiously watching to see if his tower will withstand the shaking.
We were at Legoland Discovery Center until 1PM when we left to walk over to the mall food court for lunch (Legoland Discovery Center is inside Grapevine Mills mall and next to the new Sea Life aquarium). We didn't do everything at LDC (we skipped the Lego Girls Princess Palace and Merlin's Apprentice), but did do everything we wanted to do. We had time to return to things we liked and had a lot of fun. In general, although there were a lot of people there, we did not feel overcrowded or like we were stuck waiting for something. The ride had lines and sometimes the movie line was long, but other areas seemed good. When we left the mall at 2PM (after lunch and a quick visit to the Lego shop), the line to get into Lego Discovery Center was long. I am glad we came right at 10AM like we did.
Overall impression: Legoland Discovery Center is fun with a good amount to do. I feel there are a good variety of activities fit into a relatively small place. I also feel there is a good mix of things that a variety of ages would enjoy. However, it is pricey. It cost me over $50 for myself and my two boys. It was worth it to have this experience with our visiting friends, but we will not be able to make this a regular hangout. My advice: go early and plan to stay as long as you can to get your money's worth.
Sorry for the travelogue description. I just know I've been wondering about this place and found a similar blog description helpful in my choice to go.
Nicole and Will went home today after a wonderful week of fun. I miss them already! So glad we got to have this time together including a great trip to Legoland Discovery Center!
Subscribe to:
Posts (Atom)